Archive for the 'Projects' Category

14
Dec
08

Left 4 Dead Achievement Hunting

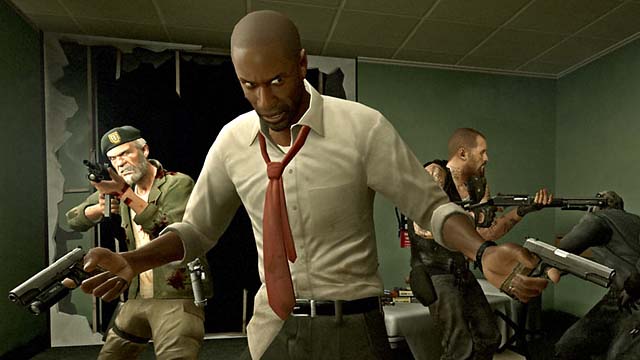
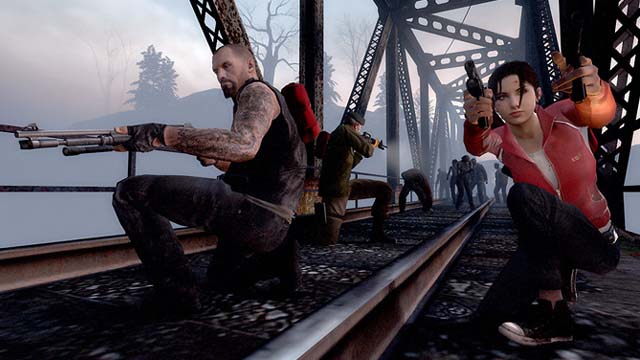
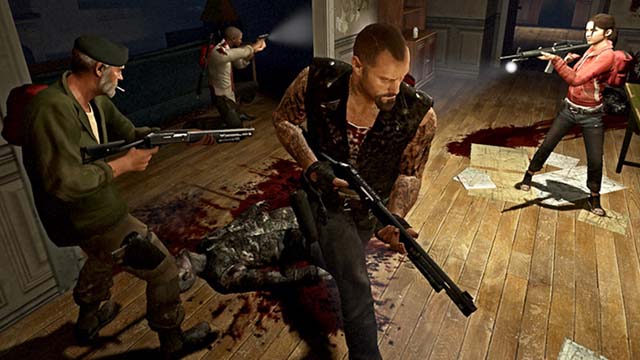
l4d_06Even though I’ve been playing the game for a few months now, Left 4 Dead remains my biggest online addiction. Lately I’ve been trying to round up as many achievements as possible…and it hasn’t been easy. But here’s a few tips for getting some of the more challenging achievements.

Cr0wnd
Gamerpoints: 30
Description: Kill a Witch with a single headshot.
Tips: While it’s possible to hit a Witch with a sniper rifle, it’s best to take her out at close range with a shotgun. But timing is very important. I’ve seen most teammates get this achievement while standing slightly behind the Witch while she’s still in a seated position. As they creep closer (with flashlight off) she begins to stand; this is the time to attack. Aim for the back of her neck and head, but you must wait until she’s standing to register the lethal hit.

Field Medic
Gamerpoints: 20
Description: Heal 25 survivors with a first aid kit.
Tips: This one just takes time but is made easier with some cooperation from your teammates. Instead of constantly healing yourself, always offer your assistance to teammates…especially if they don’t already have this achievement. As long as you heal a teammate and they heal you, you’ll both stay healthy and quickly meet the criteria for this achievement.

Ground Cover
Gamerpoints: 30
Description: Save another survivor from a special infected while on the ground.
Tips: It’s hard to stage this one. For me, it just happened. I was incapacitated when one of my teammates was pounced by a Hunter. I just took aim with my pistols and blasted the Hunter. So if you’re down, look around for teammates being attacked by Hunters or Smokers and help them out. Your pistols are surprisingly effective in these dire moments.

No-One Left Behind
Gamerpoints: 20
Description: Beat a campaign with all 4 survivors.
Tips: I didn’t think this one was too hard, but some players are having difficulty with it. The trick is to make sure all of your teammates are up and walking at the time the evac vehicle arrives. If anyone is incapacitated ensnared, or pinned, they’ll be left behind. So consider holding near the evac vehicle until all your teammates are inside. If you’re standing inside the vehicle, anyone lagging behind can be abandoned instantly if they run into trouble, giving you no time to stage a rescue attempt. So don’t step inside the vehicle until everyone is okay. Also, it’s best to attempt this on easy or normal difficulties.

Pyrotechnician
Gamerpoints: 20
Description: Blow up 20 infected in a single explosion.
Tips: This one is easy if you have the cooperation of your teammates. A single pipe bomb is sufficient to draw 20 infected prior to the big boom. However, make sure your teammates hold their fire while the pipe bomb is beeping. The more zombies that gather around the pipe bomb, the more likely you are to get this achievement.

Witch Hunter
Gamerpoints: 20
Description: Kill a witch without any survivor taking damage from her.
Tips: Depending on the circumstances, this achievement can be earned at the same time as Cr0wnd or Burn the Witch. If you need Cr0wnd, sneak up behind the Witch and perform the close range shotgun kill for the double achievement. If you need Burn the Witch it’s best to attempt this from a upper level requiring the Witch to climb before reaching you. Smack the Witch with a molotov to earn Burn the Witch, then rapidly blast her until she dies before she can attack you or your teammates to get the Witch Hunter achievement.
30
Nov
08

Left 4 Dead: Versus Mode Essentials

l4d_05
Over the turkey holiday I had the chance to play several pick-up games of Left 4 Dead’s versus mode. While I had a blast playing with the developers at Valve, my experience with public games on Live was less than stellar. Why? I think some players are still trying to get the hang of it which is completely understandable. Versus mode plays very differently than the co-op campaign or any other adversarial multiplayer game. So here’s a few quick tips to make your versus matches more enjoyable.

Don’t hog the infected slots: It may sound stupid, but I’ve waited in lobbies for more than 10 minutes waiting for a game to start simply because all four infected slots are taken. It doesn’t seem to matter that everybody gets a chance to play as the infected. Some players will join, see the infected slots are taken, then disconnect. So consider leaving some infected slots open as an incentive to keep impatient players in your lobby so you can finally start the match.

Don’t just plug in your mic, use it: I’ve played several public matches where my teammates simply don’t talk. Sure, they have mics attached, but there’s no communication. This just doesn’t work in Left 4 Dead. Communication is vital whether playing as the survivors or the infected. So get over your shyness and talk to your teammates. And don’t antagonize the 12-year-olds on your team because they will shoot you.

Speed is the key: Too often I’ve been stuck on teams of survivors that want to explore every nook and cranny of each map at a grandmotherly pace. While this may be fun in the co-op campaign, it’s stupid and dangerous in versus mode. The more time you waste exploring, the more chances you give the other team to kill you. As the survivors your goal is to reach the safe house at the end of the map as quickly as possible. Anyone who intentionally lags behind should be left behind.

Infected teamwork: The infected have a tremendous advantage if they work together and coordinate ambushes. One of the best ways to start out an attack is with a Boomer. Vomit or explode on as many survivors as possible to trigger a swarm of common infected. In addition to attracting zombies, the viscous bile also temporarily blinds all affected survivors. This allows the Hunters and Smoker on your team to take advantage of the chaos and attack, sometimes without being noticed until it’s too late.

Watch your fire: I’d say more than 50% of the damage I’ve incurred is caused by my own teammates. Friendly fire is a huge threat in versus mode so go easy on the trigger cowboy. If a teammate is pinned by a Hunter or ensnared by a Smoker, don’t shoot! Instead, melee the attacker to free your teammate, then open fire on the infected. Also, be careful when using molotovs and igniting the red fuel cans. Fire is extremely deadly, especially if your teammates are incapacitated within the flames.

23
Nov
08

More Left 4 Dead Tips

l4d_04

Left 4 Dead launched last week and it looks like most players are getting the hang of it, fully embracing the teamplay aspect of the game. But the game isn’t easy, readily apparent when playing as the survivors in the chaotic versus mode or when tackling the co-op campaign on advanced or expert difficulty. So here’s a few more tips to help your team survive the zombie apocalypse.

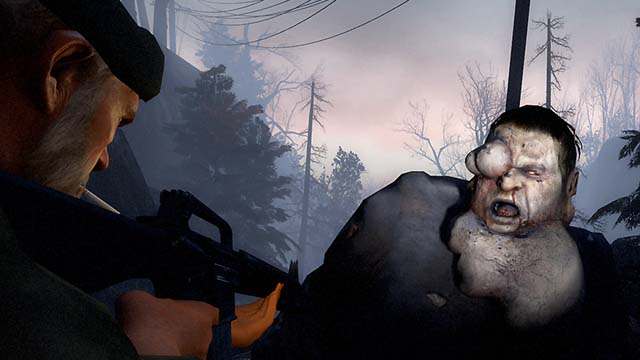
  • The Boomer is a highly volatile target and should be dealt with delicately. When encountering a Boomer at close range, don’t shoot it. Doing so will only coat you and your teammates in bile, triggering a swarm attack. Instead, melee the Boomer, pushing it away from you. Backpedal to a safe distance and shoot it. If nobody is splashed with bile, this will get you the Clean Kill achievement.
  • When attacking a Hunter on a pinned teammate, use melee attacks to knock them off. This prevents you from injuring your teammate with friendly fire—an important consideration when equipped with a high-powered weapon like a shotgun or sniper rifle. But be prepared to shoot the Hunter as soon as it’s knocked off your teammate. Otherwise it will attack again. Knocking a Hunter off a teammate with a melee attack earns you the Hunter Punter achievement.
  • If a teammate is ensnared by a tongue attack, quickly locate the responsible Smoker and shoot him. If the Smoker isn’t within view, perform a melee attack on the tongue to release your teammate. Avoid shooting the tongue to prevent inflicting friendly fire on your teammate. Once a Smoker has snared and released a target, they can’t attack for several seconds. Use this time to hunt them down before they can strike again.
  • If you can’t engage a Witch at long range, look for other ways to delay her attack. If she’s in a room, toss a molotov at her and shut the door. She’ll eventually claw her way through the door, but will sustain heavy damage from the molotov while doing so. Hitting a Witch with a molotov gets you the Burn the Witch achievement.
  • The Tank is by far the most deadly of the infected and must capture the attention of the entire team if you have any hopes of killing one. Although incredibly strong, the Tank isn’t very fast. It’s entirely possible to backpedal while firing at the Tank without getting touched. But that’s assuming you don’t run out of room or back into a corner—in which case you’re pretty much screwed.
  • The pump and auto shotguns’ extreme damage output is a double edged sword, particularly when playing at the harder difficulties where friendly fire is a huge threat. One misplaced shot could seriously injure or incapacitate a teammate. So be extremely careful when firing around teammates. If in doubt, use melee attacks until you can get a clear shot. This is critical when trying to knock away Hunters or Smokers, as attacking them directly may hurt a pinned or ensnared teammate.
  • Two pistols are always better than one. Look for pistols lying around and pick one up, allowing you to operate dual pistols. This essentially doubles the pistol’s magazine capacity, rate of fire, and damage output. There is no downside. Once a second pistol is acquired, it cannot be dropped unless you’re killed.
  • Operating the SMG requires a cool head and a steady hand. Even during swarm attacks, avoid holding the trigger down for long durations. This simply wastes ammo as your weapon pulls off target or pumps round after round into a an already neutralized zombie. And never swing the weapon left or right while firing—this is a good way to hit teammates. Lay-off the trigger, aim, then shoot.
  • Only use the sniper rifle’s scope when a teammate is nearby to cover you. While peering through the scope your peripheral vision is completely eliminated, making it easy for infected to flank you. In most situations, the crosshairs on the HUD are adequate for aiming.
  • Given the assault rifle’s automatic capability and penetration power its possible to score multiple headshots with a single auto burst. Bullets fired through one target’s head continue travelling in a straight line, penetrating anything behind it. Also, try aiming the rifle at head-level and panning the crosshairs across multiple targets to decapitate a line of approaching common infected.
16
Nov
08

left 4 dead: versus mode

l4d_03

Now that you’ve had a chance to play the Left 4 Dead demo you have a good idea of how the co-op campaign plays. But what about versus mode? Versus is an adversarial game mode pitting the survivors against the infected. No Mercy and Blood Harvest can be played in this four-on-four mode, offering ten maps total. The gameplay is nearly identical to the other modes with the survivors tasked with making it from safe house to safe house and ultimately escaping after surviving the movie’s finale. It’s the job of the infected team to stop the survivors. Unlike the other game modes, in versus the survivors cannot respawn, but the infected team can. This provides a unique twist to the game mode, forcing the survivors to work together and watch each others’ backs.

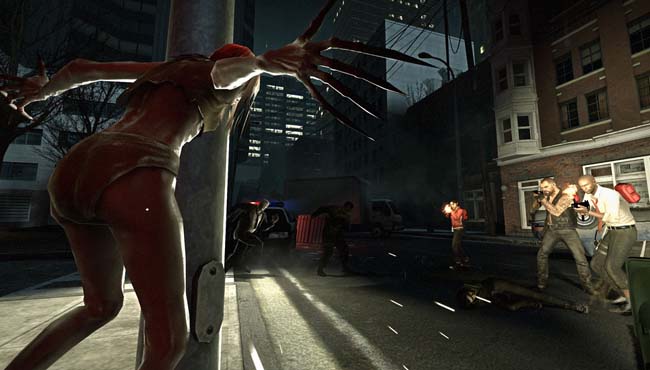
While the survivors spawn as the main protagonists, the infected team take on the roles of the special infected. At any given time the infected team always has one Boomer, two Hunters, and one Smoker on the map. Who spawns as what is random, determined by the director. At some points in the map, one player on the infected team is given the chance to spawn as a Tank, providing the team with an extra boost in offense. The Witch is not playable by the infected team, but Witches do make appearances on occasion. Witch spawns are determined by the director and are never in fixed locations. Still, the infected team should use appearances by the Witch to bolster their numbers during coordinated ambushes.

During these matches, each team gets the chance to play as both the survivors and the infected on each map. So after the survivors have escaped or died in the first round, the same map is replayed and the two teams switch sides, with the former infected taking on the roles of survivors and vice versa. Playing as the survivors and infected are completely different and require different skills and tactics to win. But regardless of which side you’re playing, communication and teamwork are always essential.

So how do you determine who wins a match in versus mode? After playing a round as the survivors a score is calculated based on this formula:

Average Distance Traveled + Health Bonus x Survival Multiplier x Map Difficulty Modifier = Team Score

Average Distance Traveled: The points awarded in this category is based on how far your team traveled during the round. If your team made it all the way to the end of the map and reached the safe house, you’re awarded with the maximum 100 points. But if your team only made it through 37% of the map before being stopped by the opposing team’s infected, you only get 37 points. The percentage of the map your team completes determines this score.

Health Bonus: This bonus is determined by averaging the hit points of the survivors who made it to the safe house—survivors who were killed enroute are not part of this average. So if everyone makes it into the safe house with full health, the max 100 points are awarded.

Survival Multiplier: Once the average distance travelled and health bonus has been added, the score is multiplied by the number of survivors who made it into the safe house at the end. If all four survivors made it in, the score is multiplied by four. If only one survivor made it, the score is multiplied by one and thus has no impact. If nobody survived, the score is not multiplied by zero. Rather the score remains untouched, with no multiplier applied.

Map Difficulty Modifier: Each map is assigned a predetermined difficulty modifier. The easiest (or shortest) maps are given a modifier of 1, and the hardest (or longest) maps are given a modifier of 2. The rest of the maps fall somewhere in between, sometimes rated as a 1.50 or 1.60. Whatever the modifier is, it is then multiplied by the score, giving you your team’s final score for the round.

So what’s a good score? Usually posting a score close to 1,000 points per map is considered a praiseworthy achievement. But ultimately it all depends on how well the opposing performed in their turn as the survivors. While no points are awarded when playing as the infected, stopping the opposing team’s survivors is critical, preventing them from posting a high score. Even killing one survivor can have a dramatic impact on the final score, especially in close matches as it robs the opposing team of that vital survival multiplier. So don’t fool around while playing as the infected. Stopping the opposing team is just as important as reaching the safe house when you’re playing as the survivors.

06
Nov
08

Left 4 Dead: Demo Survival Tips

l4d_02Today the Left 4 Dead demo goes live on Steam and Xbox Live for pre-order customers. Those who haven’t pre-ordered can get the demo on November 11th. Unlike most shooters, teamplay is essential in Left 4 Dead. So here’s a few quick tips to help your team get started:

Establish communication with your team: There’s no time to type messages back and forth, so make sure everyone on your team has a microphone and knows how to use it—a gray speaker icon appears next to their name in the lobby if they have a microphone connected. If playing with strangers online, say hi and establish a rapport with your new teammates. Breaking the ice in the lobby will pay off later as the game begins.

Get organized: Before beginning a game, discuss your individual roles. It’s usually a good idea to elect one teammate as the leader. This player will not only physically lead the team but make key pathfinding decisions at branches, determining which direction the team will go. Therefore the leader should have at least some experience with the layout of the maps you’re about to blitz through. But most importantly, the leader should possess good communication skills, constantly checking in with teammates and ensuring everyone stays together and healthy.

Diversify your firepower: When choosing weapons at the beginning of a level, mix it up, taking a couple of shotguns and two SMGs or assault rifles. This gives your team a good balance of firepower capable of engaging threats at close and long range. Never take more than one sniper rifle. Although powerful, sniper rifles have a low rate of fire and take a long time to reload. And since most engagements occur at close to intermediate range, the rifle’s scope isn’t very useful, and can even be a liability.

Stay together, stay alive: It may sound easy, but keeping four players together during a chaotic advance is a constant challenge. But it’s a challenge that must be overcome if you hope to make it to the safe house. Stay in constant voice communication with your teammates, calling out targets and issuing warnings. If you need to stop and heal, let everyone know so they don’t leave you behind. When stopping, make sure everyone gets the message. Anyone who continues advancing on their own won’t stand a chance.

Close doors: The infected can’t open doors. Instead, they must break them down with melee attacks. While a simple wooden door won’t last long when faced with such violent attacks, it will delay the infected, allowing your team to slip away or prepare to engage the attackers. Often the sound of the infected breaking down a door is just enough to get your team’s attention, preventing you from being attacked from behind.

Share the health supplies: If your character is healthy and someone else on your team is seriously injured, either heal them with a first aid kit or hand over a bottle of pills. Injured players slow down the whole team so it’s in everyone’s best interest to keep everyone healthy and moving at maximum speed. Each player can carry one first aid kit and one bottle of pills, so there’s usually enough supplies to go around if you all share.

Use the survivor’s names when communicating: It’s often easier to say Bill, Francis, Louis, or Zoey in the heat of battle than it is to decipher someone’s 15-character Gamertag. So take note of what survivor you’re playing as and respond to any questions or requests when addressed by this name.

Monitor your teammates: You can see your teammates at all times, even if they’re not in your current line of sight. They’ll appear as a blue glowing silhouette if blocked by an object such as a wall. These glowing silhouettes allow you to keep tabs on all your teammates. If the teammate’s silhouette turns orange, it indicates they’re in danger. This could mean a variety of things. They could be covered in a Boomer’s bile, dangling from a ledge, incapacitated, pinned by a Hunter, or ensnared by a Smoker’s tongue. In any case, get to them as quickly as possible to assist.

02
Nov
08

Far Cry 2: Bonus Missions

If you pre-ordered and/or purchased Far Cry 2 from Gamestop, you were given a promotional code. This unlocks a set of exclusive missions that tells the backstory of your predecessor—the man originally sent to eliminate the Jackal. To activate these exclusive missions, from the game’s main menu select Additional Content. After that, choose the Promotional Content option. This brings up the promotional code input screen. Enter the code you received when you purchased the game—it is case-sensitive, so input the code exactly as it appears. If entered correctly, a pop-up window will inform you that new content has been unlocked. For best results, unlock this content before you start a new game. At the very least, input this code before moving on to Bowa-Seko, as the first three bonus missions must be completed in Leboa-Sako.

Continue reading ‘Far Cry 2: Bonus Missions’

27
Oct
08

Fallout, then Fall Over: Guide Creation Blog 07 / 07

Part 07: The Back of the Book

An entire extra chapter with insider information, including Todd Howard's favorite armor? It's all here!

An entire extra chapter with insider information, including Todd Howard's favorite armor? It's all here!

The back of this behemoth of a book has three additional chapters, the first of which is called “Ending it All”. Flanked by a “Spoiler Alert!”, this tells you how to obtain all the endings in the game. Yes, every single one of them. Following that are the Appendices – all 22 of them. Without resorting to some nasty Spoilers, I can reveal that every type of Collectible, Unique Weapon, Fat Man, MiniNuke, and other advantageous item that doesn’t “randomly” appear is listed. However, instead of simply flagging them, every special item has its own number, Zone, precise location, and description of its hiding place. This way you can additionally refer to the Tour of the Wasteland Chapter for more information on finding the exact items you’re looking for. Naturally, all the Xbox 360 Achievements are listed too, complete with any relevant tactical advice.

    If you’re thinking of bagging the Limited Edition guide, with its hardback cover, biggest map poster, and one-inch thick spine, you’re in for an extra treat. Firstly, there are dozens of art pieces, along with narratives by the team, in a section dubbed “Post-Game, Post-Apocalyptic Musings”. Whether you’re after information on how V.A.T.S. was created, the team members’ favorite locations, and some weird and wonderful scrapped ideas, this is the chapter to turn to. Exclusive art drips from every page, including some great sketches, early designs, and other oddities.

    The goodies continue in the final section called “Tall Tales from the Capital Wasteland”. Not only do you receive Bethesda’s top tips for preventing certain death (which includes some tactical advice you never thought possible), but there’s the unwrapping of some delicious Easter Eggs, too! Next up are a half-dozen “Wasteland Wanderers”; a few of the hundreds of player characters that Bethesda team members employed during their playthroughs. Each has their own (usually disgusting, despicable, and always socially-awkward) story to tell, whether it’s the lament of Davey “Comet” MacDonald (who overly relied on Chems and booze), or Porkchops the Fish Lady, searching for her giant teddy bear and honing her A3-21 Energy Weapon talents at the same time.

    All of this is wrapped up by an Afterword typed out by Moira Brown personally, exclusive to the guide.

    Thanks for reading this Blog, and thanks to Bethesda for all their help. Please let us know what you thought of the guide by emailing dhodgson@primagames.com. This concludes your Fallout 3 author blog.

Check out both the regular edition game guide and the collector’s edition game guide.

26
Oct
08

Fallout, then Fall Over: Guide Creation Blog 06

Part 06: Tour of the Capital Wasteland: Overview

A grim and unforgiving landscape, dotted with hundreds of areas to explore, like this long-abandoned church.

A grim and unforgiving landscape, dotted with hundreds of areas to explore, like this long-abandoned church.

    In an attempt to craft the most valuable guide imaginable, we went kinda crazy with this section. Clocking in at over 200 pages (just over two-fifths of the total pages in the Limited Edition guide), the Tour of the Capital Wasteland was to serve two main purposes: 1: To allow you to instantly locate an area you’re needing help with, and 2: To reveal the items available, so you can judge whether a sortie is worth the risk of possible (and almost always grisly) death. This took around two months of hard graft to achieve, but the results were definitely worth it: You have a complete atlas of the entire game world at your fingertips.

    Written with the map poster in mind (although all the poster maps also appear inside the guide too), the Tour begins with explanations on the information each location has to offer. To start with, if the location is featured in a Main, Miscellaneous, or Freeform Quest, this is noted. Then comes the Threat Level (rated from one to five), so you can quickly ascertain whether to bring a 10mm Pistol, or a hulking great Follower armed to the teeth with a Minigun and a bad attitude. Then comes a Faction flag; showing you which Wasteland group controls this area; especially useful as you can bring preferred killing equipment to the expedition. Services are flagged for each location, too; so you can instantly know whether you’ll find a Healer, Repairer, or Trader. Next up are possible dangers (aside from the regular enemies); such as the types of traps to watch out for. Finally, the type and number of Collectibles the location has is shown, as well as more “miscellaneous” information; like whether you can find a Follower, sizable ammo caches, Perks, Radio Signals, and even a place to live in.

    Delve a little deeper, and there’s information on the dozens of Mini-Encounters that you might run into. Following that, the entire Wasteland is subdivided into nine sprawling Zones. Each Zone gets an Overview (which shows the Collectibles present in the entire area, as well as Primary and Secondary locations). Every single location can be found by either tracing the Latitude/Longitude on the Map Poster, or by its own Zone number. Naturally, the overview map looks just like the one on your Pip-Boy, so you can easily spot where you are. Once the overview is out of the way, you can dig into each specific area. Let’s take the church in the screenshot as an example.

    This is the eighth Primary location in Zone 1, so it is flagged as location 1.08. Instantly locatable on a map, there’s a list of assets, and a biography of any inhabitant living at the location (in this case, no one important enough is around). If the area has a likelihood of an enemy encounter, it is listed here, too. Then comes general and succinct tactical advice for the location, along with any Freeform Quests. Freeform Quests are smaller and optional tasks, usually taking place at one or two locations, and every single one of them is shown during this chapter.

    For larger settlements, such as Megaton, every single location within town is revealed, the type of Terminal and Locked Doors are shown (so you know whether your Skills are good enough to allow you access), and more importantly still, every location that needs it gets its own map. Maps have waypoints labeled on them so you know where every major occurrence is. With well over 150 “interior” maps (that aren’t on the poster), it took a team of four map makers around three months to finish them all, and they look superb. Naturally, they’re all extremely detailed (down to computers on tables, floor tiles, and debris piles), and are a great way to learn the topography of a location without blindly trekking through increasingly hostile corridors without any knowledge of how vast an area is.

    Around a third of the Tour showcases the labyrinth of the D.C. Metro Area itself. A massive series of locations that join the exterior Wasteland via dozens of snaking underground tunnels, finding your way around here is almost impossible without an “underground” map. Fortunately, there is one, so you can figure out the quickest routes between major areas. Naturally, each underground location gets its own map, too. There are 11 D.C. Metro areas to witness too; whether it’s the somber gloom of Arlington Cemetery, or the awe-inspiring Mall and Capitol Building, these get a meticulous going-over, too.

    Whether you’re out on a jaunt and want to find some specific enemies to slaughter, you’re out to grab every single particular type of collectible, or you’re encroaching an area that looks foreboding, this chapter can be dipped into and skipped across in a multitude of ways. Whatever you’re doing, and wherever you’re going, try utilizing the Tour to get there and back with a greater chance of living than you thought possible!

    Come back on launch day (Tuesday 28th October), where we finish off this blog in style with some extra-cool Appendices, and Limited Edition content information.

Check out both the regular edition game guide and the collector’s edition game guide.


25
Oct
08

Fallout, then Fall Over: Guide Creation Blog 05

Part 05: Main and Miscellaneous Quests: Chapter Overviews

A Brotherhood squad comes kitted out with all the best killing ordnance, and comes to your aid at a critical moment in a Quest.

A Brotherhood squad comes kitted out with all the best killing ordnance, and comes to your aid at a critical moment.

Much of this book (196 pages, in fact) is taken up with a thorough and meticulous exploration of the Main and Miscellaneous Quests you can begin at any point during your adventure. Segmented into dozens of logical parts, the strategy guide has some key advantages for getting the most (or just the very basic facts) from any point in the game, whether you’re exploring the basement of Tenpenny Tower, or searching for your father and finding out more about your upbringing, and his plans for the future. Expect copious amounts of advice throughout these chapters, which includes the following elements:

    Firstly, these two chapters of the guide are easily flipped to, as there’s an intuitive “tab” system on the side of the book, so you can locate a chapter in a second. Then, we’ve assumed you want to either “dip in” to a specific part of a Quest you’re having difficulties with (or want to find out more information about), or you’re content to read through an entire Quest to figure out all ways to complete it. Either way of reading the guide is simple to achieve: Firstly, the top-right of each page has the section of the Main Quest, or the specific Miscellaneous Quest named, along with specific Vault-Boy iconography. The first page has a complete overview of your course of action, with the main settlements flagged so you can easily cross-reference them with the guide’s poster map. There’s even a small mini-map showing the major location where most (but not all) of the Quest’s action takes place in.

    Perhaps the coolest element of these chapters is the Quest Flowchart. For every part of the Main Quest, and every Miscellaneous Quest, there’s a plotted-out series of boxes and arrows, in one of three colors (white, red, and green). White boxes refer to Objectives you’ve unlocked (or yet to unlock) on your Pip-Boy. Red boxes indicate actions you need to attempt, and green boxes reveal the rewards you receive if the action is successful. As every major path variant is showcased in these flowcharts, and you can easily figure out your next course of action without wading through pages of text. Main and Optional paths are shown in this flowchart, along with the characters you need to interact with, the locations to visit, any recommended Skills and Items you might want to use, possible enemies to encounter, and whether your path has a particular Karmic influence. More often than not, checking these flowcharts gives you enough encouragement to continue playing the game with minimal interruptions.

    Naturally, after the Flowchart is a highly-detailed Walkthrough, too. There are captioned screenshots dotted throughout, along with text designed to inform and entertain. We hone in on every specific detail, with objective flags in the text so you know which part of the Quest you’re reading about. There are also icons showing every major item you can pick up, and box-outs showing particular Statistics, Skills, and Perks to employ at every critical point. Again, Karmic choices are flagged in the text too, and there’s the obligatory notes, tips, cautions, and spoilers to try to ensure you don’t die, and also don’t accidentally read a section with game-changing information in it! We even went as far as noting when computers, holotapes, and other information sources provide pertinent (or simply flavorful) information. “Exhaustive” is a great description to apply to these chapters. “Exhausted” is a great description of my mental state after writing these chapters.

    So, every gameplay path is catered for, every eventuality is noted, all possible rewards are flagged, and there’s help aplenty – not just to see you through the adventure, but to point to hundreds of possibilities you may not have even thought about. No wonder these chapters took two and a half months to write….

   Come back on Monday 27th October, where the Tour of the Capital Wasteland (over 200 pages in length) is detailed and dissected. 

Check out both the regular edition game guide and the collector’s edition game guide.

23
Oct
08

Fallout, then Fall Over: Guide Creation Blog 04

Part 04: Bestiary Chapter Overview

Three parts insect and two parts disgusting. You don't want to know what the Bloatfly throws at you...

Three parts insect and two parts disgusting. You don't want to know what the Bloatfly throws at you....

CAUTION! Some minor spoilers ahead!

Although not the largest chapter in this gargantuan-sized strategy guide, this is perhaps the one that packs the largest concentration of thoroughly enjoyable and tactical goodness. If you’re wanting to know what just rammed into you and defiled your corpse after an ill-fated Wasteland wander, this is the chapter to peruse. Basically, you’ve got all the information on every single living entity in D.C.’s smoking remains, and the surrounding area. Rest assured; there’s stats aplenty here.


But to begin with, there’s some highly detailed “canon” about the variety of Wasteland Factions that battle the irradiated hellscape for supremacy (or in the case of feral ghouls, fleshy morsels). This is the section with revelations about the government forces known as The Enclave. There’s background information on the Brotherhood of Steel, as well as an “Outcast” contingent that have been spotted in the wilds of the Wasteland. The Vault Dwellers themselves get a good going-over; then it’s back on the surface to read the raison d’etre of the Raiders, and other scum that shoot first, and ask questions after they dance on your entrails; the Talon Company Mercenaries.


There’s some rather interesting reading about Super Mutants, and how these hulking beasts have arrived at the East Coast, some background on a small Merc clan called Reilly’s Rangers, and some general information on those seeking a meager existence outside the confines of Megaton. Next up are Slavers, and the poor humans they barter with. Then come the Ghouls, and finally there’s some revelations about small pockets of the Chinese military that still survive, decades after the bombs dropped. You’ll also find out about an odd collection of folk known as The Family, and some other clandestine organizations too….


[Remember; these are the main Factions that exist here; specific settlements, and the weird, wonderful (and sometimes feral) populace inhabiting them, are detailed in future chapters.]


Now, about those stats…. The second half of the Bestiary goes into (actually rather obsessive) detail about every single beast, being, mechanoid, and mutant you can battle. I won’t list every single entity in this blog post, but I will reveal the type of information you can find (and then rely on). Among the informative statistics is the “Level” of the enemy; basically, when your character reaches this level, you can expect a preponderance of this type of foe. Then there’s “Perception”. This is the entity’s PER stat, and the higher the stat, the quicker you’re spotted, surrounded, savaged, and bludgeoned to death.


Needing to know a foe’s Health Points is always a benefit; especially as you can cross-reference this with the damage each weapon causes (that’s the big table in the Training chapter), and then work out how many 10mm Pistol shots it takes to drop a Mole Rat (the answer is five by the way, if you didn’t miss, and didn’t cause a Critical Hit). Some of the less primitive (and more bipedal) adversaries you meet have their own Big Guns, Energy Weapons, Melee Weapons, and Small Guns Skills, so we noted their precise ability values, too. Why? So you can tell how adept that a Raider carrying a Flamer is (the answer, by the way, is “reasonably” – that value is 45/100).


Next up is the Armor they wear (which you can then cross-reference with the Armor equipment table in the Training to work out how much damage they can absorb (hint; not much if you aim at an exposed head!). Then there’s information on their Primary and Secondary means of attack. For example, there are 11 Raider “variants” you might encounter. If you see one with a Hunting Rifle, you can instantly reference it in this chapter, and find out all the information about him (or her). Finally, we reveal the likely experience points for dropping each foe. For the slightly less “humanoid” entities, there’s complete information on the type of (usually disgusting) unique damage they cause, and any special notes (like whether the foe has a weak point, flees easily, or is much faster than you).


All in all, it’s essential statistical viewing, and quickly enables you to figure out how to approach – and then dominate – combat. Come back on Saturday 25th October, when we reveal how we put together the massive Main and Miscellaneous Quest chapters together.

If you can’t wait that long, check out both the regular edition game guide and the collector’s edition game guide.


May 2024
M T W T F S S
 12345
6789101112
13141516171819
20212223242526
2728293031